
In our last blog post, we briefly discussed some points to ponder before taking the leap into your beekeeping journey. Today we are taking time to answer a portion of those questions. Let’s cut to the chase!
What equipment do I need?
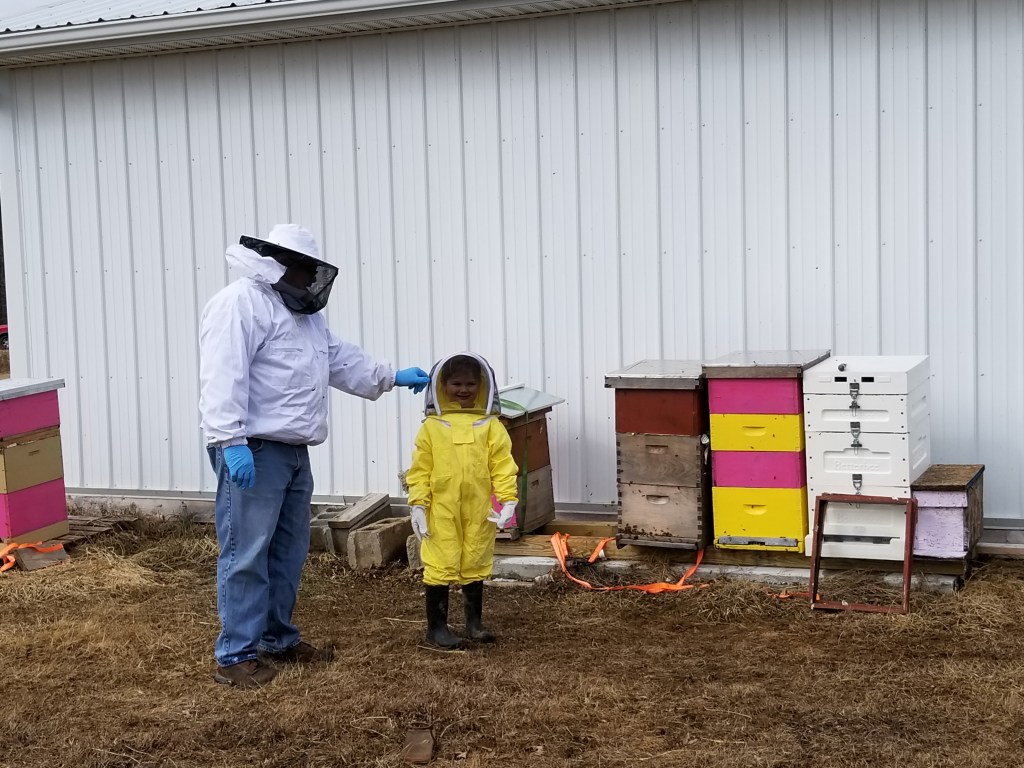
When you’re first becoming a beekeeper, there are a few basic supplies you will find indispensable. The most important piece of equipment for a new beekeeper, in my opinion, is a bee suit. I know jackets and veils are cheaper, but until you become comfortable and confident handling your bees, you need to make sure you’re protected. I am familiar with a second-year beekeeper in my county that let her guard down in the wrong place at the wrong time. She unzipped her suit to stop and take a phone call; upon returning to her hives, she left a portion of the suit unzipped and soon found herself being transported to the hospital with hundreds of stings to her face, neck, and chest. She’s fortunate to have survived. This can happen to anyone, although it is rare. An ounce of prevention is worth a pound of cure. Spend the extra money to get yourself a full suit until you’re positively sure you can safely tend your bees with less coverage.
With that sobering part behind us, let’s move on to some other equipment, shall we? One tool I can’t live without is my hive tool. It doesn’t need to be fancy, just functional. I may or may not have lost my hive tool during my first season keeping bees and ended up using a large straight screw driver and a metal putty knife. The bees were none the wiser. Now we have found a style of tool that we love, and Doug makes them custom for us. (Shout out to all the tool and die and metal workers out there!)
Item number 3 on my list is a smoker. (No, not the kind you fixed jalapeno poppers in a while back.) You can use a wide variety of fuel including cardboard, paper, cotton fabric, denim, burlap, wood pellets, and pine needles, or you can just buy smoker fuel from a bee supply house. (But please, no diesel fuel; you don’t need roasted bees.) My favorite smoker fuel was sold by Brushy Mountain Bee Farm, which no longer exists. Sad face. A smoker is imperative to keeping your bees “calm” by disturbing their communication pheromones and ushering them away from you while you work.

Beekeeping gloves may be another item you find useful. Many folks won’t tend bees without them. However, I prefer disposable nitrile gloves. They allow for ultimate dexterity and keep your hands clean. WORD TO THE WISE: nitrile gloves are not “sting-proof.” If you don’t willingly embrace the idea of fat, itchy fingers, start out with lambskin beekeeper gloves. Also, red or black gloves are ALWAYS a bad idea! Bees cannot see red and black because of the spectrum of light they process (bees see in ultraviolet shades of blue and green primarily.)
When honey harvesting time comes, your bee brush will serve you well. Again, it doesn’t need to be anything fancy; some people use large flat leaves or even turkey feathers. Others have bought a cheap ice scraper with a snow brush at the dollar store to use the brush on their bees. I have used a soft needled pine sprig in a pinch! The goal is to gently brush the bees off of a frame or another area of the hive; it even works on those hard-headed ladies that don’t follow the advice of your smoker.
What type of hive should I use?
Here in the US, most beekeepers use either Langstroth style hives or top bar hives, with Langstroth being the most prevalent. My experience with top bar style hives is very limited, so today I’m going to focus only on Langstroth hives. (And try very, very hard not to give you a history lesson today.)
These iconic vertical bee boxes are available in 10 frame and 8 frame configurations. These numbers refer to how many frames the box is designed to hold. For anyone here that is very new to beekeeping, a frame is just what it sounds like: a thin rectangular frame of wood or plastic that creates a surface on which the bees will build comb and fill with brood (baby bees,) honey, and pollen. Frames are hung vertically within the hive body. The majority of beekeepers choose 10 frame equipment because it is the easiest to come by and is the “gold standard” for honey production. That being said, a deep 10 frame box of honey can weigh upwards of 80 or 100 pounds. Not all of us are capable of or comfortable with carrying that sort of weight around. Which is exactly why many people choose to do 1 of 2 things. 1.) Use medium or shallow depth 10 frame hive boxes for honey production or 2.) use 8 frame hives instead of 10.
8 frame equipment has become very popular with backyard and hobbyist beekeepers in recent years, and for good reason. The bees seem to thrive just as well in this smaller cavity space, and boxes full of honey are between 60 and 80 pounds rather than nearly 100 pounds. When I first started beekeeping, my 2 hives consisted of 8 frame medium boxes. Since I was working bees by myself at the time (and I’m not the hulk) they mostly worked out very well. There are more options for hivebodies on the market, but for simplicity’s sake, we’ll not go down that rabbit hole today.
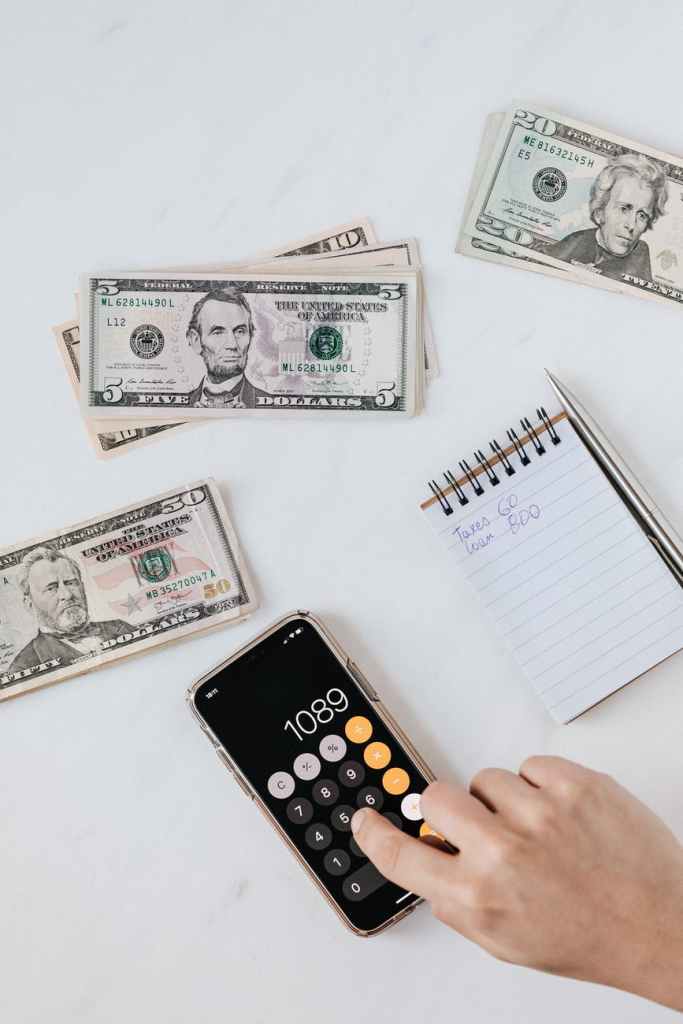
How much does it cost to get started?
This seems to be the $100 question. And the answer is complicated; beekeeping can be as expensive or as inexpensive as you want it to be. Several years ago I attended a session at our annual state beekeeping conference that demonstrated “bare bones beekeeping.” I’m fairly certain every vendor at that conference hated that man for his message: bees don’t need bells and whistles. Glance at a catalog for any major beekeeping supply store, and your brain will likely explode. There are a thousand of extras, upgrades, and “must haves” within those pages. If you are sticking to a budget, resist the temptation! You don’t need an 18 frame electric honey extractor and a heated bottling tank right off the bat. And you may never need them. But there are those among us that are “gadget people” and will most likely end up dropping some hefty change on specialty items and neat add ons.
The basic necessities to keep a colony of bees include (average price per item listed as well):
• Your PPE (gloves and beesuit) – $89.00 +
• Basic tools (bee brush, smoker, and hive tool) – $40 +/-
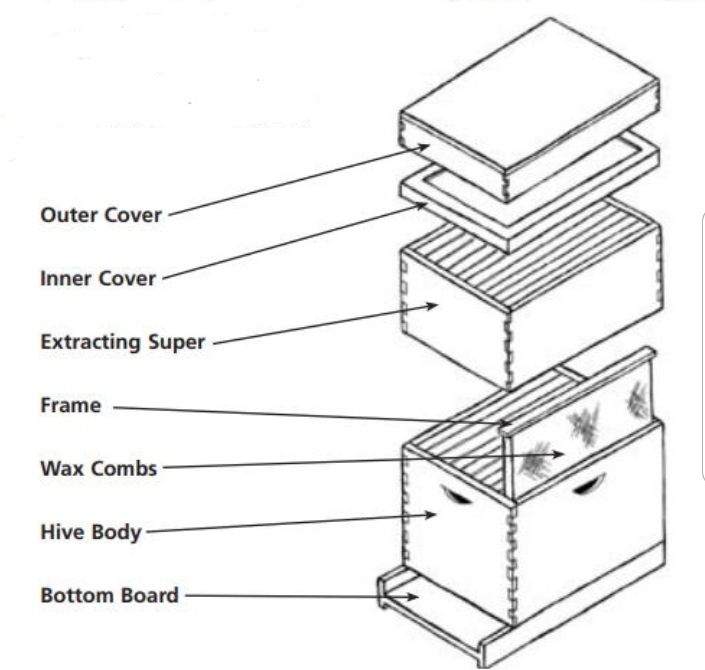
• One complete hive setup per colony. This includes:
▪︎bottom board and entrance reducer – $20 +
▪︎hive body with frames (called a brood box) – $55 +, assembled
▪︎inner cover – $17 +
▪︎telescopic cover – $30 +
Total estimated cost for 1 complete hive setup and PPE: $250 and up.
If you are ok with “some assembly required,” you can purchase hive bodies and frames unassembled. Typically this will save you around $15 or more per complete hive body. Over the years as our apiary has grown from 2 to over 30 hives, we have found that buying unassembled hive bodies and frames in bulk from our nearby Amish craftsmen is our most dependable and economical option. Their work is of very good quality, and they typically offer discounts when you buy a large quantity.
Many bee supply stores (Dadant, Mann Lake/Kelley, BetterBee, etc) offer beginner kits which typically include a smoker, veil, hive tool, bee brush, and one complete hive setup (1 or 2 hive boxes included, prices will vary.) Another option is to build your own woodenware. There are several websites available that can provide you with plans for nearly all hive components. Try here and here for starters. If you choose this route, you will pay for lumber, nail or screws, glue, etc. and your frames/foundations. And your sweat equity of course. If you have the capability, this is a wonderful option.

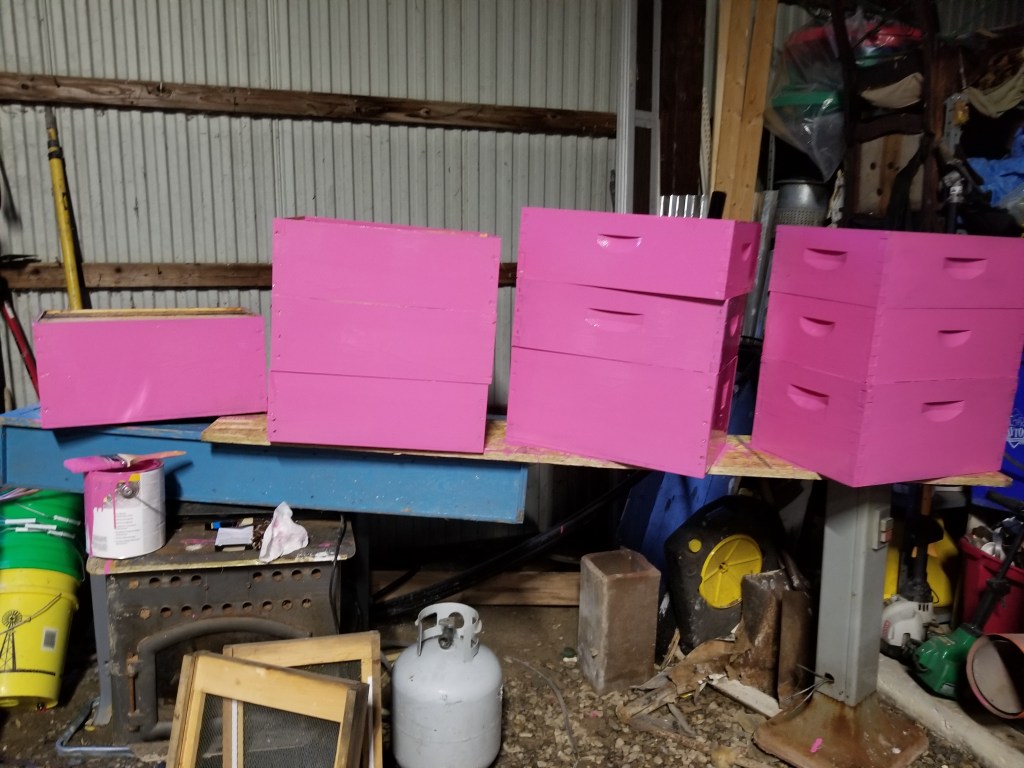
In the past, we have also bought used equipment from beekeepers that were getting out of beekeeping, or downsizing. The boxes, bottom boards, and covers pictured below were rough to say the least. After taking a blowtorch to the insides of the boxes and adding a fresh coat of paint, most of these boxes are still serving us well. They were purchased for a song, but it was quite labor intensive to prepare them for use. (Scorching the interiors helps prohibit the possible spread of disease from the apiary they came from into your apiary. This step is crucial from a biosecurity perspective.)

One small detail I didn’t elaborate on previously is painting your hives. You will need to protect your investment from the elements, so choose an outdoor paint and apply it to only the OUTSIDE of your hive. Don’t paint the frames, or inner cover, etc. as the bees will take care of all that. You can use any exterior paint you have hidden in your garage or shed, as well as deck stain. Check in the clearance aisle of your favorite home improvement store for mis-tinted paint, you can generally pick it up for pennies on the dollar. Watch out for oil-based paints… I still have clothes with bright pink smudges from the bee boxes that took A YEAR to completely dry. With experience comes wisdom or so they say. Oh. And make sure to have your hive set up and ready to roll BEFORE your bees arrive. They don’t like wet paint very well. Again, something about experience and wisdom, but I digress.
As your colony grows, additional hive boxes with frames will be necessary. This brief compilation is just the bare minimum needed to get you started. Beekeeping is an investment, so spend wisely. Remember, if the price for an item, or a colony of bees for that matter, seems unrealistically cheap… you’re likely to be dissatisfied with the quality of your purchase. Subpar equipment can make-due in a pinch, but it isn’t ideal.
How much time does it take?
After installing your bees (instructional posts to follow, eventually,) expect to spend around 15 minutes per colony every 2 weeks. You’re going to feel clumsy and unprepared the first few times you inspect your new colony, so it may take a little longer at first. Certain tasks such as mite treatments may require more time and attention as well. We will discuss this in a later post. You’ll be very tempted to check on your new creatures more frequently than once every 2 weeks, but resist the urge. Many experienced keepers believe that disturbing the hive more frequently (unless there’s a good reason) can disrupt the queen’s laying.
Do I need a large backyard or a field to put my hive in?
Not necessarily. If you can place your bee hive away from areas that are high in human or pet activity, most locations will suffice. Keep several factors in mind however. For example, do you have neighbors nearby that are allergic, or may not appreciate your bee hives being in close proximity to their property? Do you or any neighbors near you have a swimming pool? Bees, for whatever reason, are drawn to chlorinated and salt water pools alike. Bees + (pool + humans) = stings + anger. No matter what you try, you won’t be able to keep those bees out of the pool. A key concept here is communication. Many neighbors can be swayed into agreement with the promise of a jar of honey at the end of the season. You know, as payment for allowing your bees to defecate on their lawn and steal food from those dandelions they hate anyways.
Also, does your neighborhood have ordinances against keeping bees? Make sure to check with the powers that bee (see what I did there?) in your area, as well as your insurance agent before proceeding. You may need to make your agent aware of your hives for liability reasons.
Chemical use is another big issue. Do you or your neighbors have their lawns treated for weeds, or sprayed for insects? Does your neighborhood receive mosquito fogging services? Bees can travel up to 5 miles while foraging, so you won’t prevent all chemical exposure. It’s unlikely you’ll ever convince Mrs. Crampitt down the street to stop having her pristine lawn taken care of. And trying to convince her might cause more harm than good, so choose your battles wisely.
Can I keep bees in the city?
If your city doesn’t have standing ordinances prohibiting it, then absolutely yes! Rooftop and urban beekeeping is all the rage these days. In fact, there are several studies that compare bee colonies in urban areas and those in monoculture farmed rural areas. Guess which bees generally thrived and produced more honey? The urban bees! You can read more about that in this article.

Where can I get bees?
Unless you plan to catch a swarm of wild bees (which is probably the most invigorating and satisfying experience ever for a new beekeeper!) you are going to need to buy your bees. Most bee supply stores sell packages with 2 to 3 pounds of bees. Those bees are fine. But here is my opinion. Most packaged bees that are available have been produced in the southernmost states. If you live in the south, this is likely irrelevant to you. However, for those of us residing in more northerly climes, this can cause several issues.
1.) If bees are purchased and installed too early, there may not be adequate forage for them yet. Therefore they will require extensive feeding. By feeding, I mean sugar water (1 to 1 ratio) being fed directly to them via a boardman feeder, internal frame feeder, etc.
2.) With southern bees come the wretched small hive beetles. Years ago, SHB did not exist in my region. This past summer we were in a constant, and I mean CONSTANT, war with these filthy little vermin. Many companies boast that their honeybee packages are “100% SHB free.” I hope their packages really are. But that’s all we can do is hope. SHB can destroy a colony and ALL of its honey stores in a very brief period of time. I will rant no further about these nuisances for now; they’ll be given their own blog post someday. Nasty critters.
3.) Bees reared in the warm southern areas of the US are not adapted for long, cold, northern winters, resulting in high numbers of colony losses year after year.
How can you remedy these issues? Try buying bees from local overwintered stock. I understand that this is not possible in every situation. Whenever it is an option, choose to buy bees from your native climate or one that is colder. A quick call to your state apiarist or entomologist can be ever so helpful in finding beekeekers near you that are selling bees. In many cases, these local keepers will sell you a nucleus colony (nuc) instead of a package. A nuc typically consists of 4 or 5 fully drawn frames containing brood, honey, and pollen as well as LOTS of bees and their queen. Having frames already full of brood and resources will give your bees a head-start compared to dumping a package of bees into a brand spanking new hive.

As you consider which option is right for you, keep in mind that a package of bees is typically less expensive than a nuc. In my area, packaged bees bring upwards of $120, whereas a $160 nuc is considered a deal! I’ve heard of nucs in other counties and states going for as high as $250 a piece. Also, many states require honeybee colonies to be registered with the state. In my state, this consists of a yearly payment of $5 per apiary (bee yard) and a statement that you either agree or dissent to a state apiarist being granted permission to inspect your hives. Your state may differ, so look into it.
In coming weeks, I will cover the remainder of the questions from the previous post, as well as any others that are brought to my attention. Hopefully this post has helped to clear the muddy waters a bit for you new beekeepers out there. This hobby can be overwhelming, I know. But with a lot of determination and a little guidance from fellow beeks with some experience under their belts, you can do this. We are still learning more every year. That’s part of the intrigue, I believe. Keep learning and keep doing. And don’t give up.
-Laura
